Choosing your first glamping tent can feel surprisingly confusing. One site offers a romantic bell tent, the next a multi-room safari lodge, and prices swing from around $100 to well over $600 a night. Add in talk of canvas weights, waterproof ratings and heating options, and it’s easy to freeze up and book whatever looks pretty in the photos.
This guide breaks the decision into simple, practical steps. We’ll look at which tent style fits your trip, how much space your group actually needs, how to match a tent to the season and weather, what a first glamping trip really costs, and the material and setup details worth checking before you pay. We’ll also cover when to book and what should be included in your stay. By the end, you’ll know exactly which glamping tent suits you and can reserve it with confidence.
What Kind of Glamping Tent Fits Your Trip?
The first decision is the easiest one to get wrong: picking a tent style that doesn’t match your trip. A tent that’s perfect for a two-night couples’ getaway can feel cramped and under-equipped for a week-long family stay. Think about how many nights you’ll be away, who’s coming, and how much comfort you expect before you fall for a photo of a particular canvas shape.
It also helps to be honest about how you’ll actually use the space. If you plan to spend your days hiking or exploring and only return to sleep, a simpler setup will serve you fine. If you picture slow mornings with coffee, rainy afternoons with board games and a proper place to spread out, the roomier styles earn their keep. The style you choose shapes the whole rhythm of the trip, so give it a few minutes of real thought rather than picking on looks alone.
Here are the four main styles you’ll encounter, and who each one suits best:
- Bell tents: the classic round canvas tent with a central pole and guy lines fanning out around it. The curved walls and warm canvas feel have made it the poster child of glamping, and it works best for couples and small families on shorter trips.
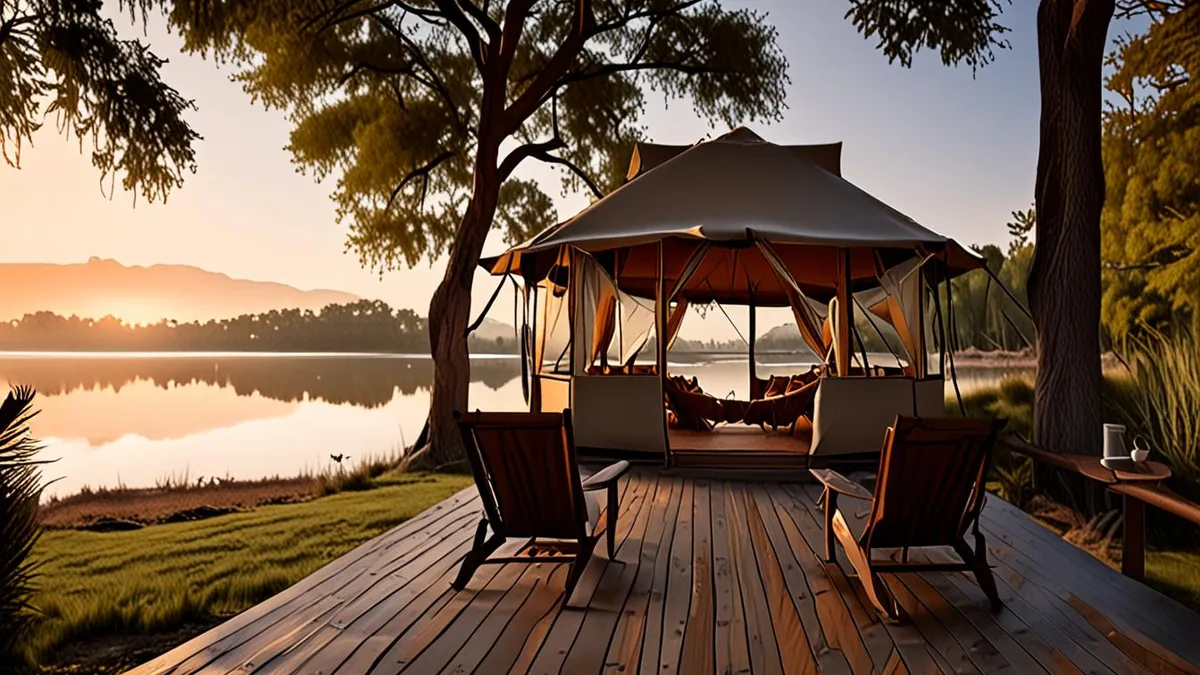
- Safari-style tents: large, house-like structures with solid floors, framed walls and often multiple rooms. Separate sleeping areas and covered porches make them the natural pick for longer stays where you want real living space, not just a bed.
- Inflatable or poly-cotton tents: lighter, quicker models that go up fast and often come with built-in air beams instead of poles. Ideal for a spontaneous weekend when you want the glamping feel without a lengthy setup.
- Yurt-style and dome tents: rounded, sturdy structures with good insulation and often large panoramic windows. These shine on cold-shoulder-season trips when nights drop and you still want a view from your bed.
If you’re torn between two styles, let trip length decide. A weekend favors the simpler options; anything beyond three or four nights justifies the space and solid structure of a safari tent.
One more tip: ask the site owner which styles they recommend for their location. A windy ridge or a shaded woodland pitch can suit one tent type far better than another, and owners who host guests year-round usually know exactly which of their setups performs best in which spot.
Sizing Your Glamping Tent: How Much Space Do You Really Need?
Tent size is where first-time glampers most often overpay or under-book. Sites list capacity based purely on how many beds fit inside, which leaves zero room for suitcases, muddy boots or a rainy afternoon spent indoors. A “sleeps four” tent is genuinely comfortable for two adults with luggage and lounging space, not four people plus their gear.
The two classic styles scale differently. Bell tents typically sleep 2-6 people depending on their diameter, with everyone sharing one open round space. Safari tents handle groups of 2-8, and their separate sleeping areas give families and friend groups real privacy at night.
As a rule of thumb, add 30-50% extra floor space beyond the stated sleeping capacity for luggage and lounging. And don’t ignore vertical space: check the ceiling height if you want to stand upright and move around inside, especially in bell tents where walls slope steeply toward the edges.
- Couples: a smaller bell tent is plenty, and the sloping walls matter less with two people and one bag each.
- Families with kids: look at safari tents with separate sleeping compartments, or size up your bell tent so kids’ beds and bags don’t dominate the floor.
- Groups of friends: separate sleeping areas prevent awkward shared-space mornings; confirm how beds are arranged before booking.
- Rainy-day stays: the bigger your floor space margin, the more comfortable you’ll be if weather keeps you inside for hours.
When in doubt, size up one capacity level. The price difference is usually modest, and the comfort gain is immediate.
Matching the Tent to the Season and Weather
A tent that feels magical in July can be miserable in October if it isn’t built for the conditions. Start with timing: peak glamping season runs May to September in most temperate regions, when nights are mild and most canvas tents perform at their best. Book in that window and almost any well-made tent will serve you well.
Rain and waterproofing
For typical three-season rain, waterproof canvas ratings of 300-500 mm cover what you’ll realistically face. Don’t assume a higher number is automatically better with canvas; breathability matters as much as the rating, since canvas that can’t release moisture feels clammy inside. If you’re traveling in the shoulder months and expect temperatures below 10°C, look for four-season canvas or insulated domes rather than a standard summer tent.
Heat and humidity
Warm, humid nights are the other challenge. Ventilation panels and mesh windows matter most in humid summer months, letting air move through the tent while keeping insects out. A tent with only one small opening can turn stuffy fast, so check the photos and descriptions for multiple vents or mesh sections before you book.
A quick question to the site owner also helps: ask how the tent handles the conditions typical for your dates. Experienced glamping operators will tell you honestly whether their setup stays comfortable in the rain, the heat or a cold snap.
Budget: What a First Glamping Trip Really Costs
Let’s talk money, because glamping prices vary more than most first-timers expect. Entry-level glamping stays typically run $100-200 per night. At this price you usually get a proper tent with real beds, plus shared facilities like a communal bathroom or kitchen block. It’s the sweet spot for a first trip.
Premium safari or dome setups cost $300-600+ per night. What you’re paying for is space and privacy: multiple rooms, wood-burning stoves, private bathrooms and often a deck with a view. These feel closer to a boutique hotel room than a tent.
Glamping versus DIY camping
It’s fair to compare glamping with traditional camping, which usually costs around $30-60 per night. But remember that glamping is gear-free: no tent to buy, no sleeping bags, no stove. If you’d only camp once or twice a year, the convenience often justifies the higher nightly rate.
One easy way to save: shift your dates. Off-peak weekday rates can cut 20-40% off peak-season prices, and you’ll often get a quieter site as a bonus. Check current rates directly with the site, since prices change by location and season.
Materials, Weight and Setup: Practical Checks Before You Book
Not all glamping tents are equal when it comes to weight and setup time, and this matters more than you might think. Traditional canvas tents weigh 40-80 lbs and typically need 30-60 minutes to pitch properly, especially if you’re tensioning guy lines and fitting a groundsheet for the first time.
Inflatable poly-cotton models are the easier option. They weigh 25-50 lbs and usually set up in under 20 minutes: roll it out, pump it up, peg it down. If you’re driving to the site, weight matters less; if you’re carrying gear any distance, it matters a lot.
Before you book, check the fabric and construction details. These are the features that separate a comfortable stay from a soggy one:
- Taped seams — factory-sealed stitching that stops water wicking through needle holes, the most common leak point in any tent.
- Bathtub-style floor — a floor material that curves up several inches along the walls, keeping ground water and mud out even in heavy rain.
- UV-treated fabric — coating that slows sun damage, important because canvas left in strong sun for a week degrades far faster than treated material.
Finally, ask the site a simple question: do they pitch the tent for you, or is it self-setup? Many glamping operations arrive to a ready-made tent, which completely changes the arrival experience. If you do pitch it yourself, allow extra time on your first attempt.
Booking Your Glamping Tent at the Right Time
Glamping has grown popular enough that the best tents at the best sites sell out well in advance, especially during the May to September peak season. The most sought-after tent styles — whether that’s a classic bell tent for a couple or a roomy safari tent for a group — tend to disappear first, leaving late bookers with awkward layouts, less desirable positions, or no availability at all. Booking at the right time is genuinely the difference between your first-choice tent and whatever’s left, so it pays to plan your reservation window as carefully as you plan the trip itself.
- Reserve 2-3 months ahead for summer weekend dates. Summer weekends are the busiest window at most sites, and popular tent styles go first. Booking a couple of months out gives you real choice over layout and position, plus time to compare what each tent includes.
- Book 6 months out for holiday periods and festival weekends. Long holiday weekends and local festivals can fill a small site within days of dates going live. If your trip overlaps one, treat it like booking a flight and commit early.
- Read the cancellation terms carefully. Many glamping sites require 14-30 days’ notice for a refund or date change. Weather happens, plans change — know the deadline before you pay, and consider whether you need flexible or refundable rates.
- Confirm exactly what’s included. Bedding, heating, cooking gear and private bathrooms are not standard everywhere. A tent that looks cheap online may charge extra for linens or have no kitchen access at all, which changes the real cost of your stay.
Once you’ve booked, save the confirmation email and note the cancellation deadline in your calendar right away, so it doesn’t catch you by surprise. A quick message to the site a week before arrival to confirm check-in details rarely hurts, either — it’s a good moment to ask about parking, arrival windows, or anything you should bring. Do this much, and your first night under canvas should go smoothly.
Your First Glamping Trip, Simplified
Choosing a glamping tent doesn’t have to be complicated. Start with the basics: how many people are traveling and how long you’re staying. Bell tents suit couples and small families, while safari tents work better for bigger groups or longer stays. Match the tent to your group size and trip length first, and half the decision is already made.
Then layer in your budget and the season. A comfortable night under canvas typically runs between $100 and $600 depending on the setup, so pick a tent that handles the weather you’ll actually face and stay within that range. Book early, confirm exactly what’s included, and your first glamping trip should be pleasantly hassle-free. If this guide helped you plan your trip, leave a comment or share it with a fellow first-timer.